经过 DongshanPI-D1s开发板使用教程之SHT30温湿度传感器(I2C)数据读取 的学习研究,已经可以使用I2C设备了。
进过进一步的研究,又点亮了LCD1602(I2C)液晶显示屏,下面给大家分享。
网上的一段介绍如下:查看原文
LCD1602液晶显示器是一种使用广泛的字符型液晶显示模块。它是由字符型液晶显示屏(LCD)、控制驱动主电路HD44780及其扩展驱动电路HD44100,以及少量电阻、电容元件和结构件等装配在PCB板上而组成。该显示屏的优点是耗电量低、体积小、辐射低。
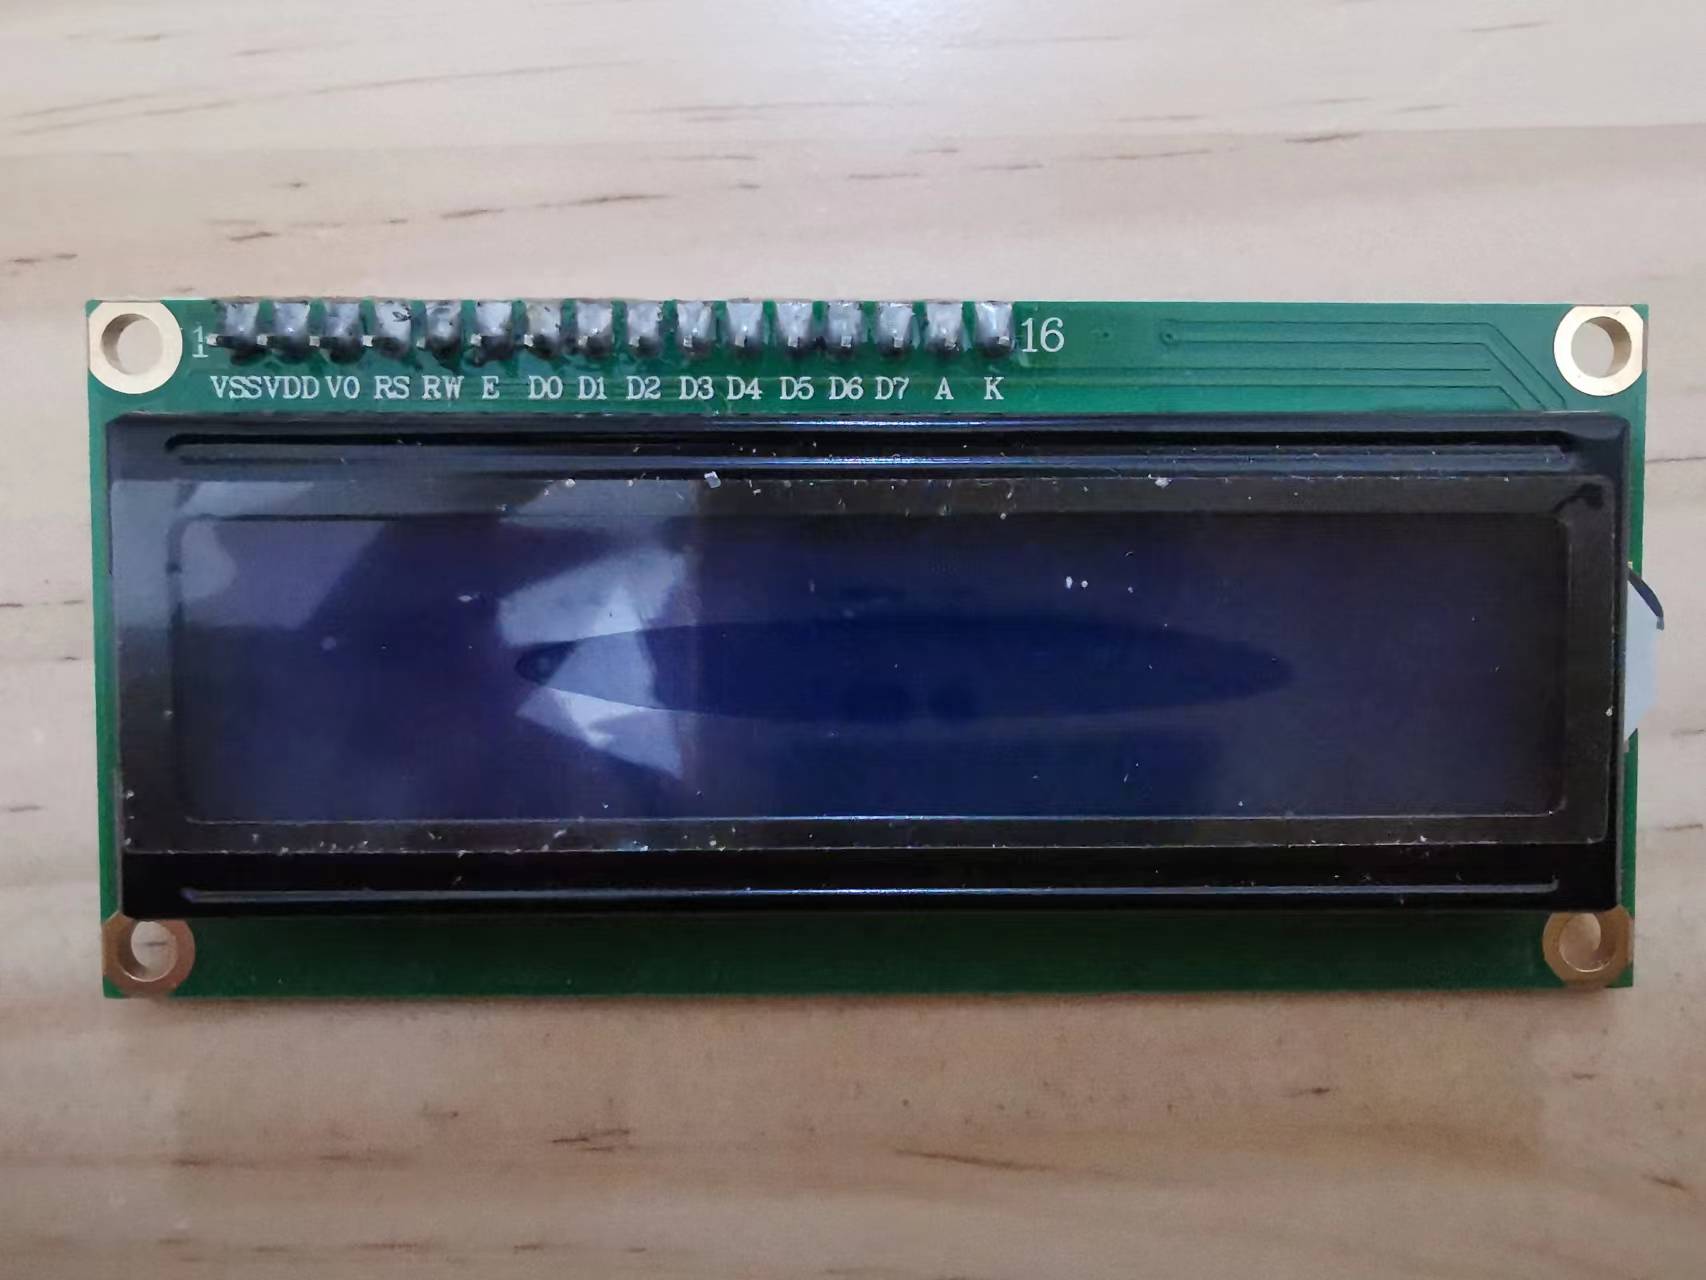
LCD1602主要用来显示数字、字母、图形以及少量自定义字符。可以显示2行16个字符 ,拥有16个引脚,其中8位数据总线D0-D7 ,和RS、R/W、EN三个控制端口 ,工作电压为5V,并且带有字符对比度调节V0和背光源AK。
为了方便使用,通常会添加I2C转换模块,这样只要两根数据线,就能够进行控制使用,大大减少了IO口的占用。
一、硬件材料
- D1s开发板:DongshanPI-D1s开发板
- LCD1602:I2C接口
- 连接线:杜邦线若干,需要2.0转2.54线;手头没有转接线,直接用测试钩
LCD1602(I2C)液晶显示屏:
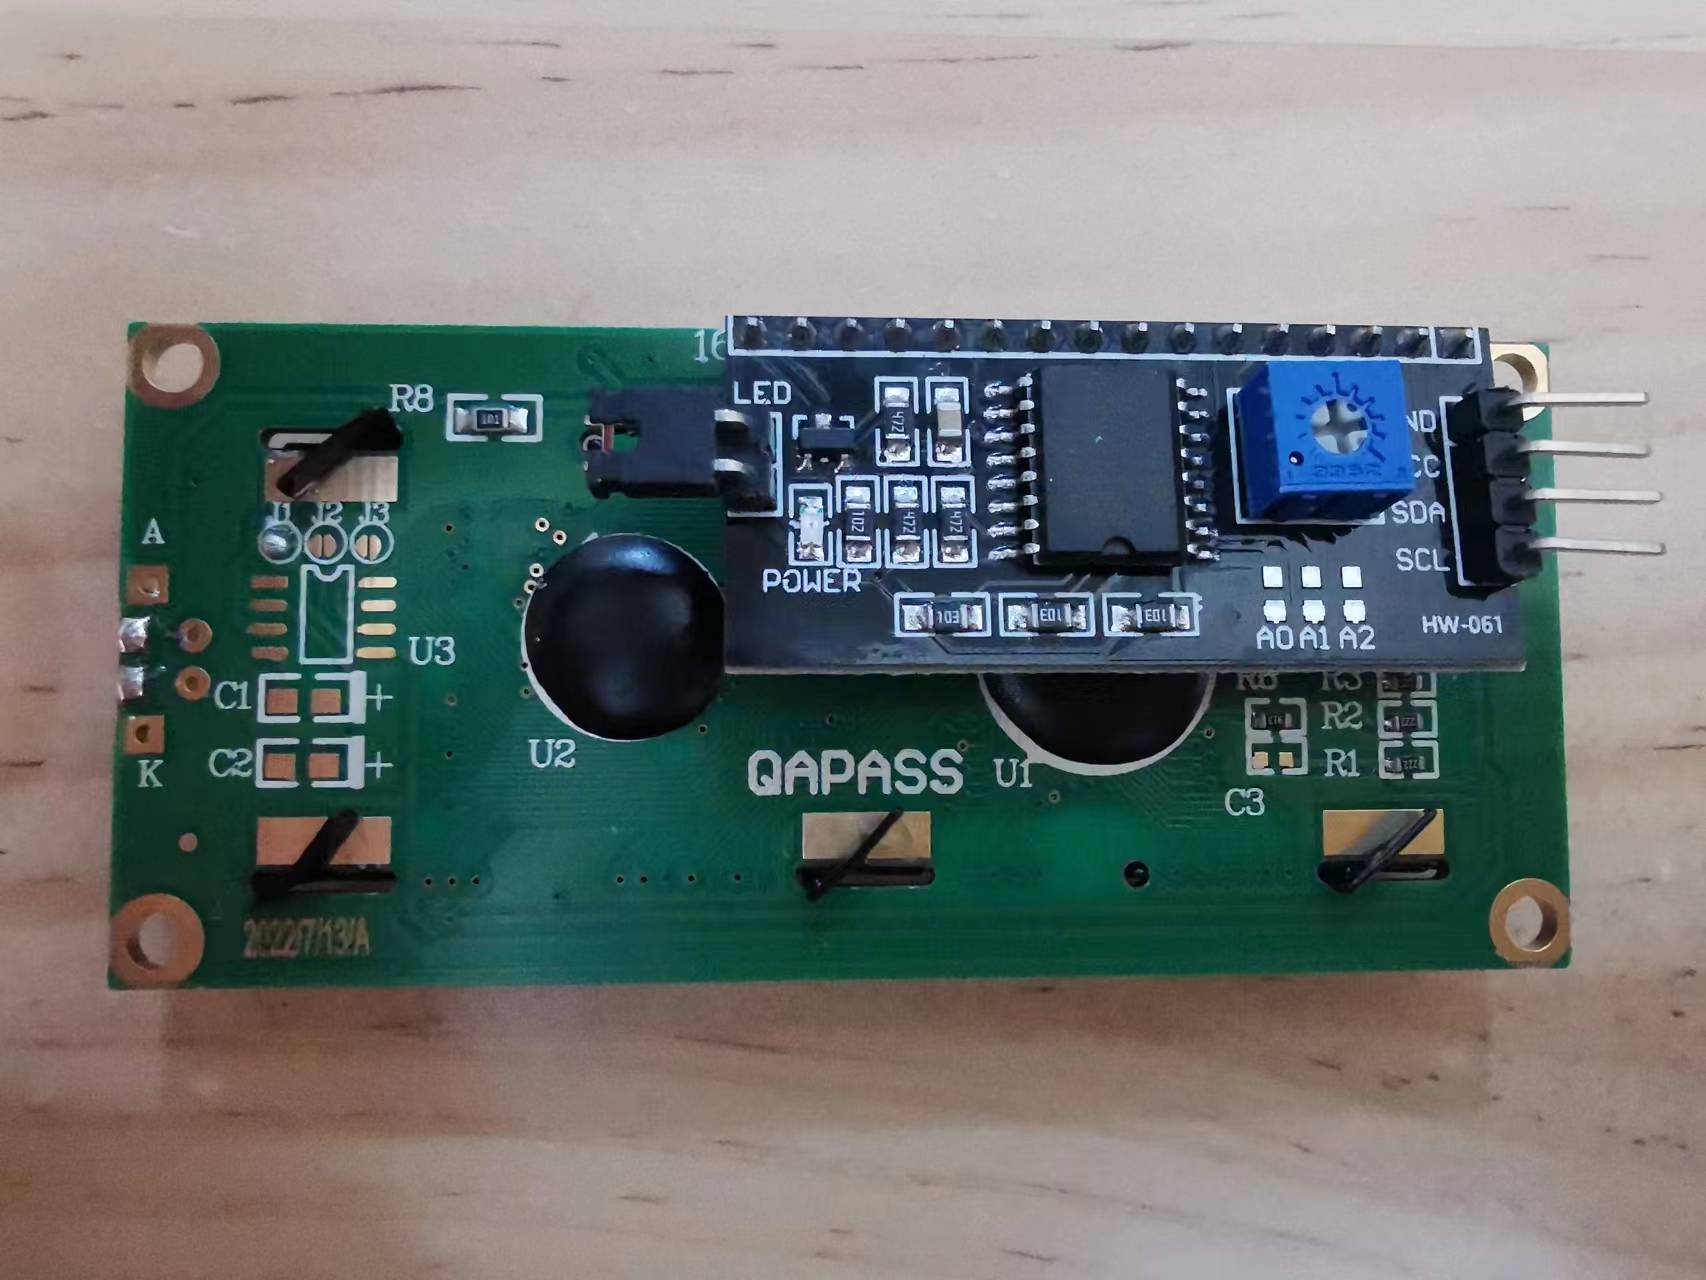
背板上的这个小板子,就是I2C转换模块。
背板上,有两个著名的牛屎芯片!!!
二、原理图
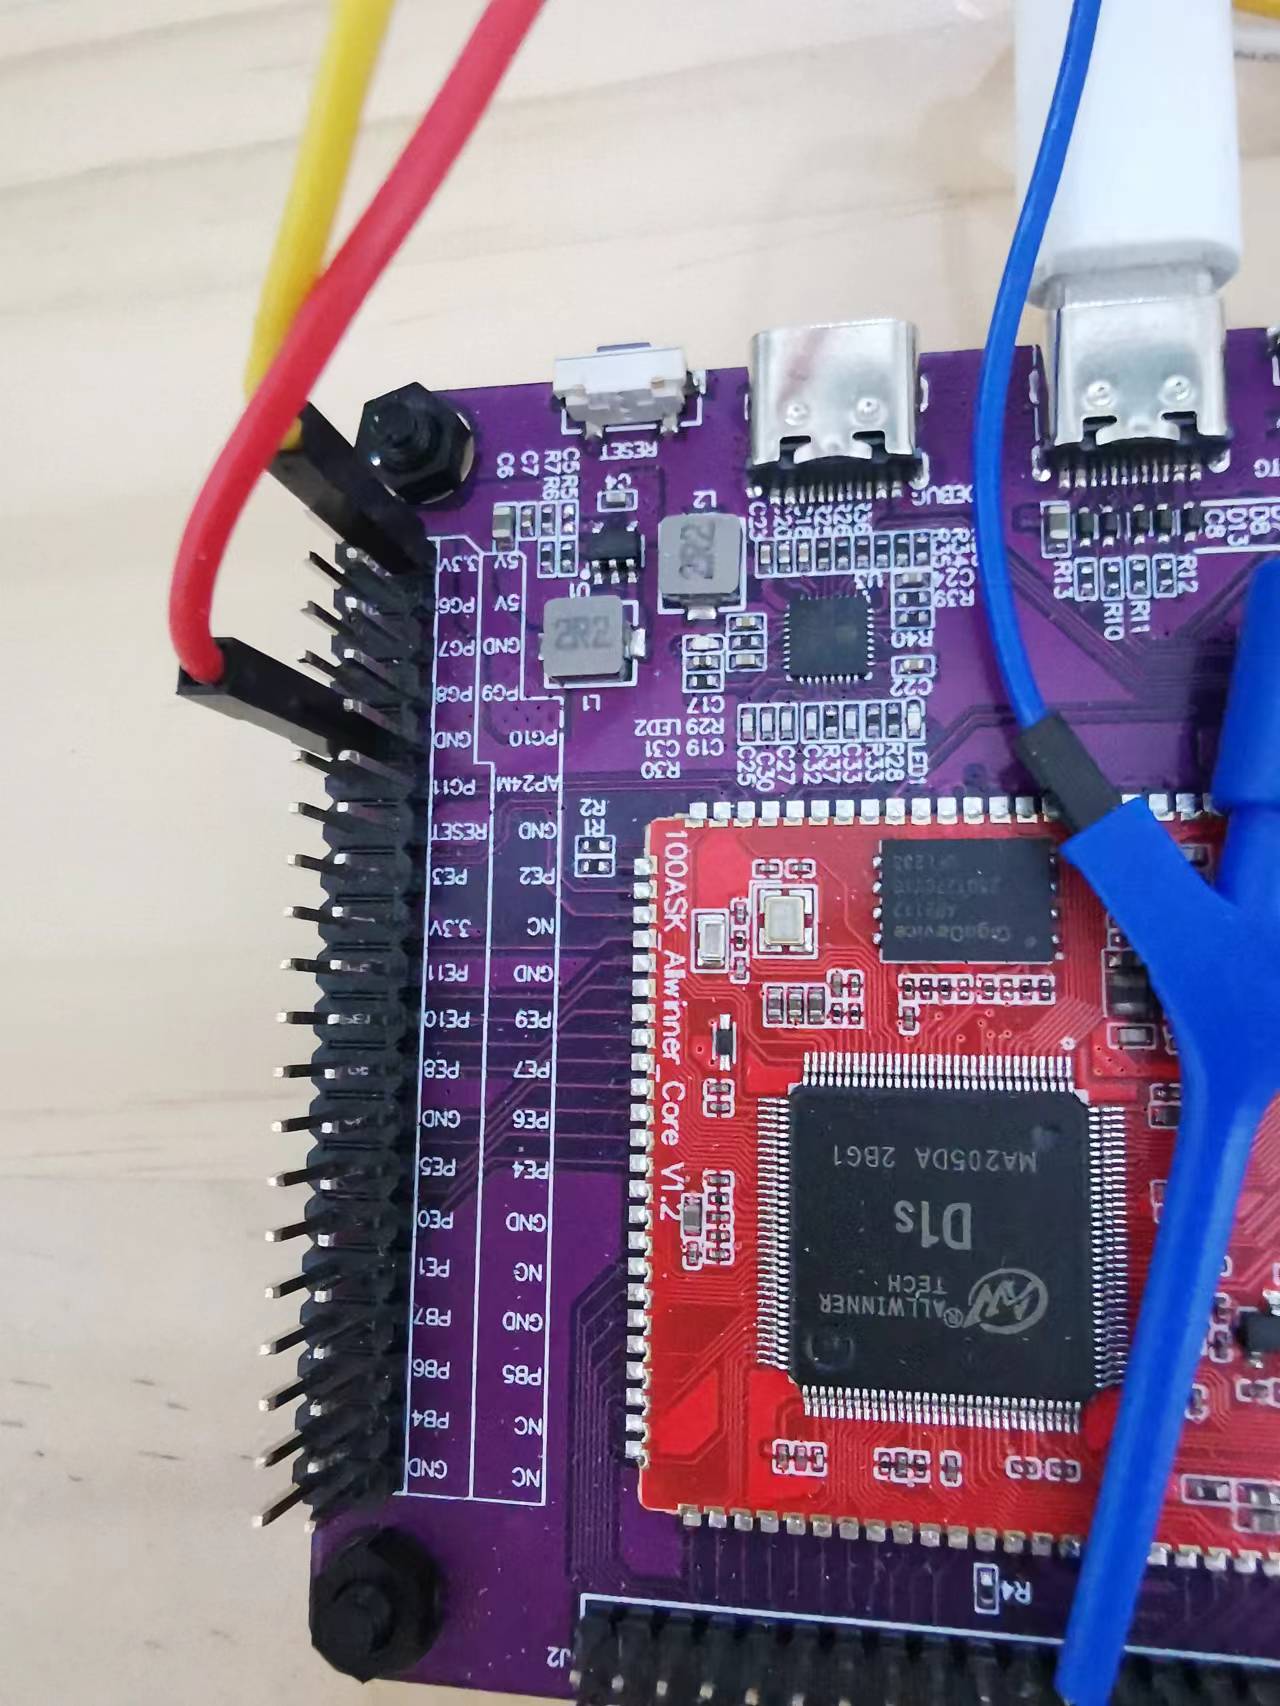
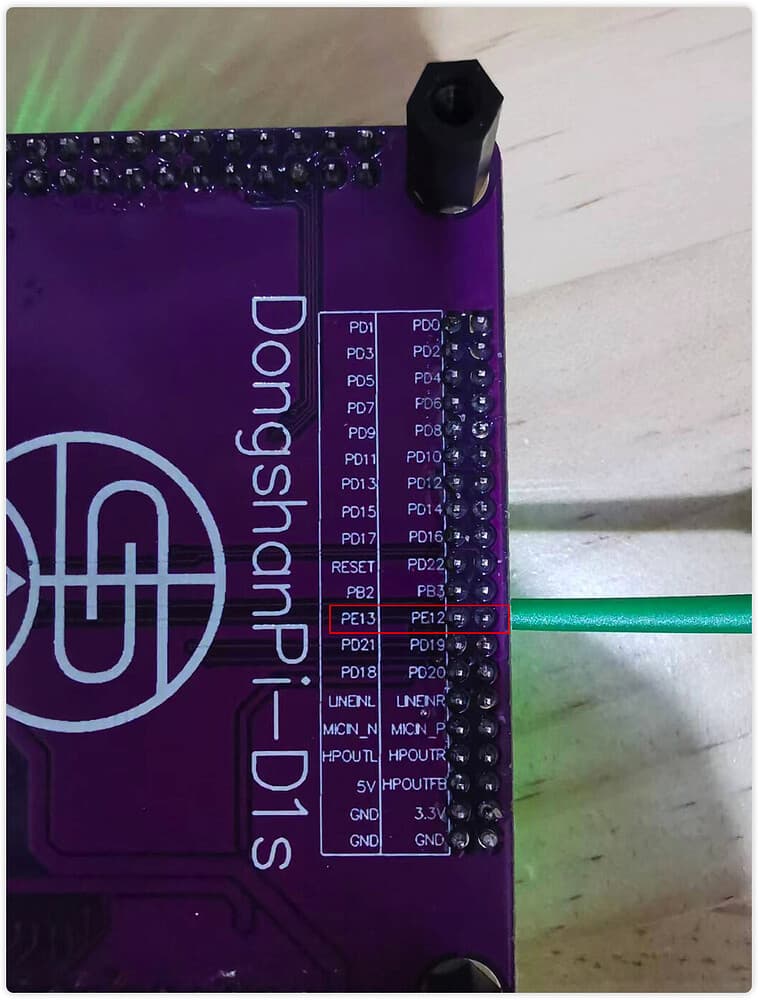
通过查看DongshanPI-D1s开发板的原理图,了解到I2C接口使用和连接:
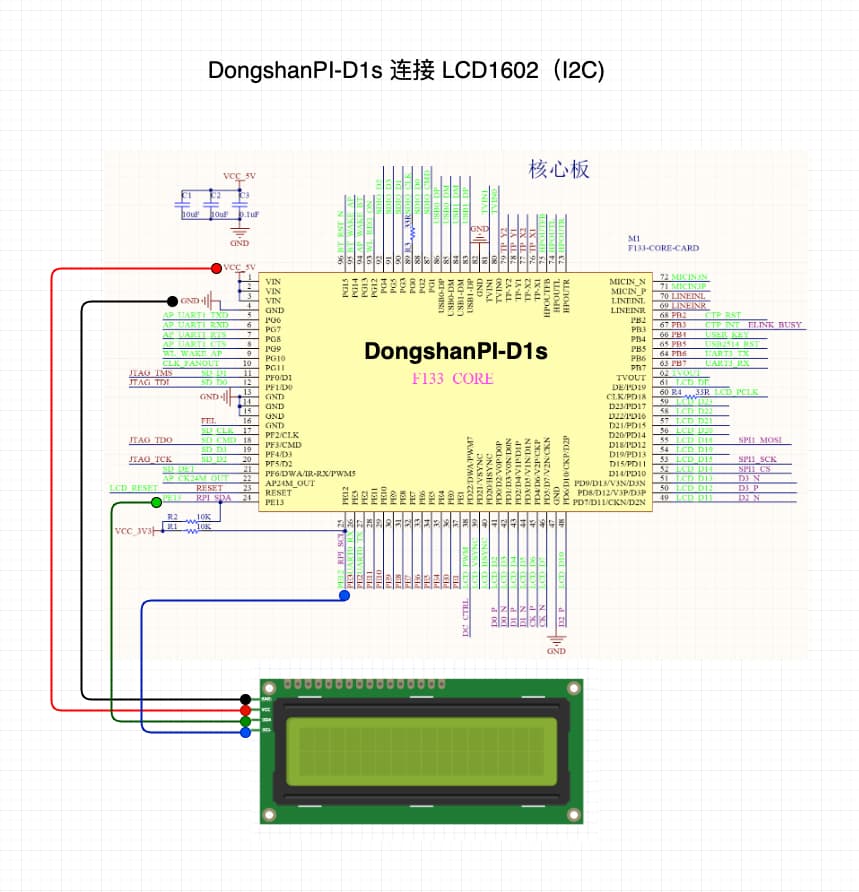
在上图的左下角,可以看到:
PE12:SCL
PE13:SDA
需要注意的是,默认系统中,开启的是I2C2。
三、实物接线
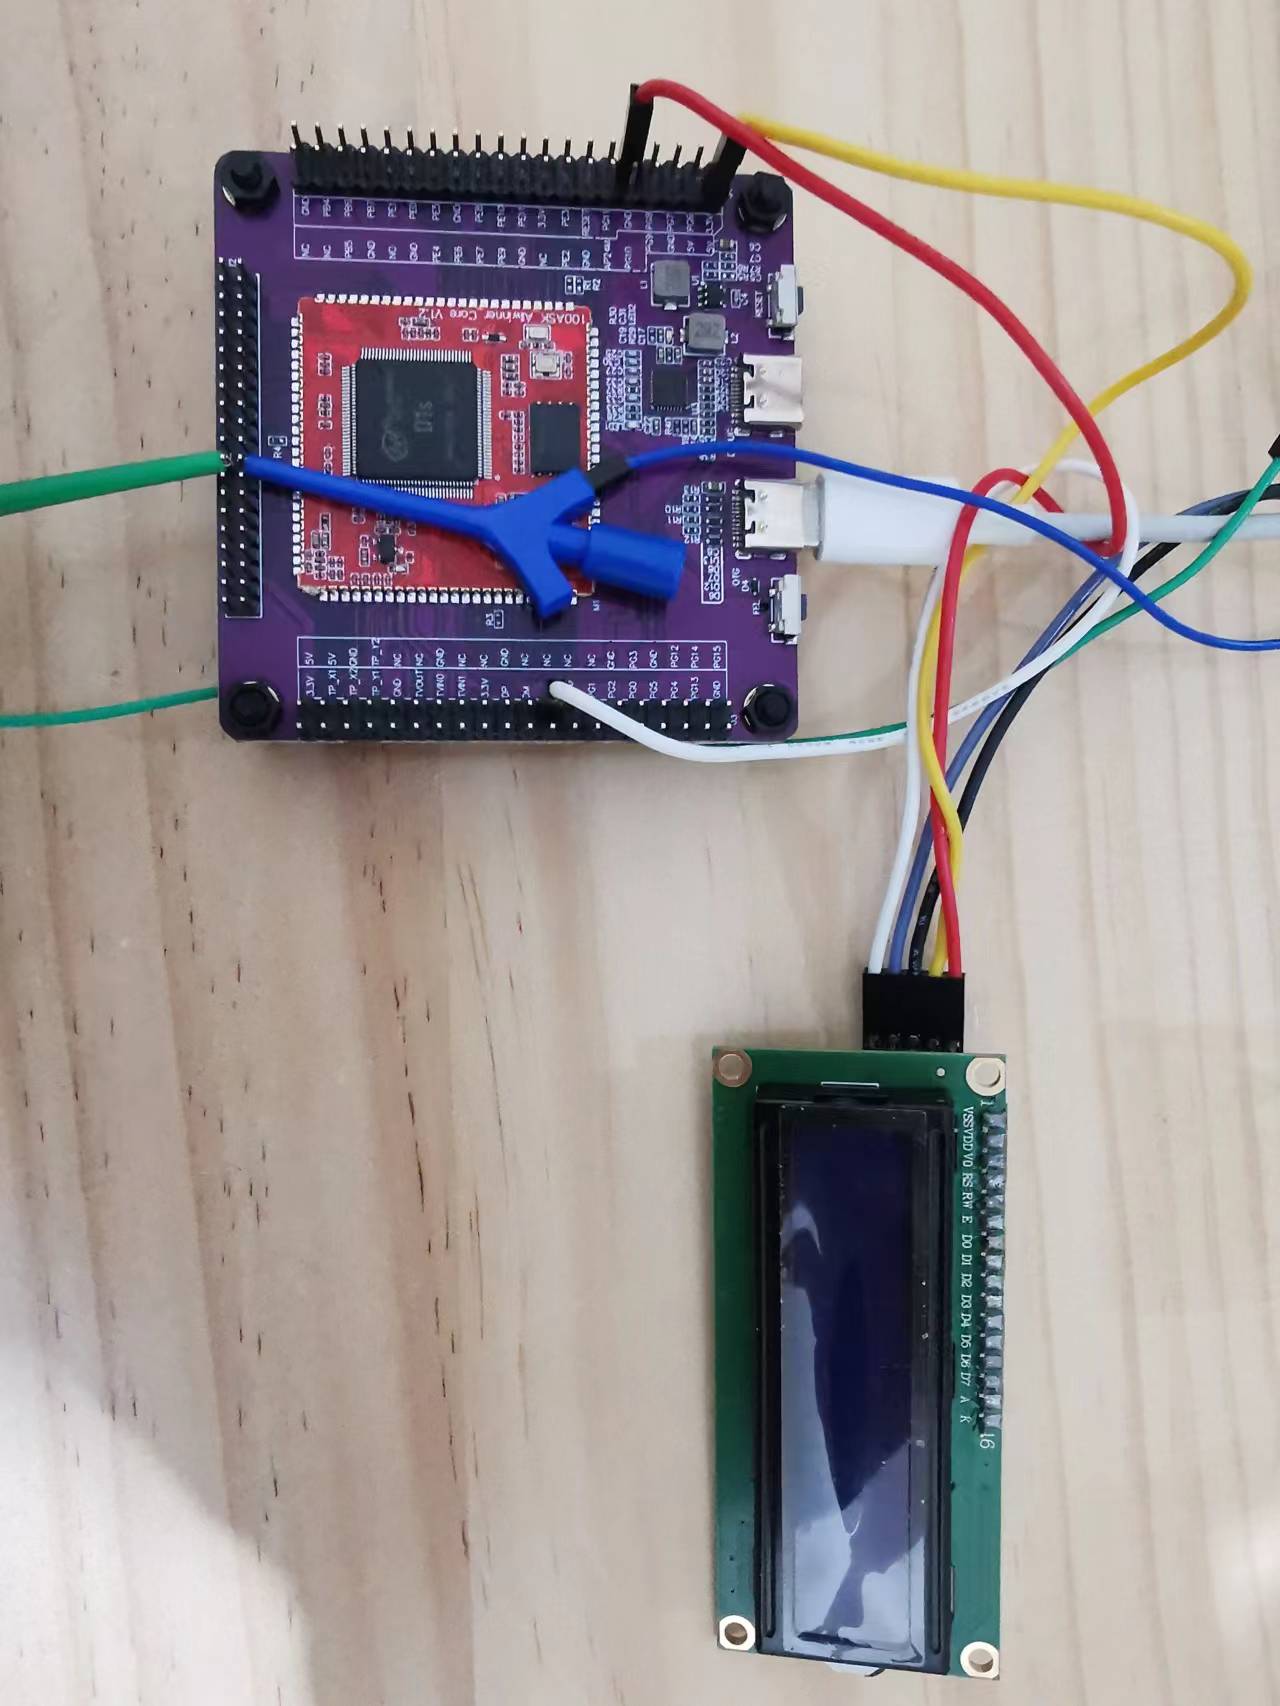

需要注意的是,LCD1602需要使用5V电源。如果使用3.3V,LCD背光会亮,但是字符不会显示。
四、编译固件
参考 DongshanPI-D1s开发板使用教程之SHT30温湿度传感器(I2C)数据读取 进行。
如果已经编译烧录过,则不用重新编译烧录,直接使用即可。
五、I2C设备检测
DongshanPI-D1s开发板启动后,参考 DongshanPI-D1s开发板使用基础文档【编译、烧录、adb、gpio-led、c】 使用OTG接口通过adb连接,再进行下面的操作。
- 执行
i2cdetect -l查看当前的I2C控制器:
可以看到,当前可用的i2c设备为i2c-2 - 执行
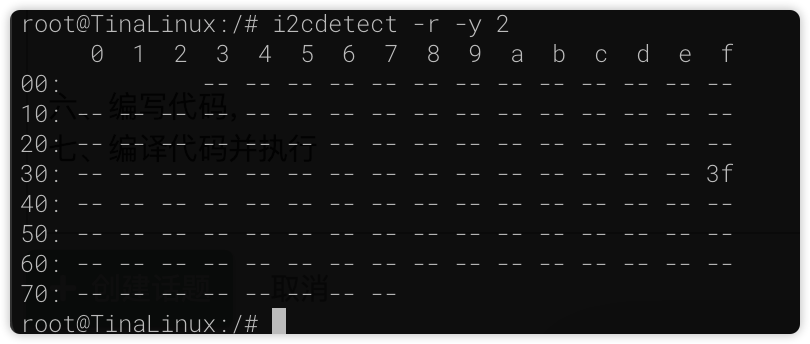
i2cdetect -r -y 2,查看识别的I2C外部设备:
可以看到,LCD1602(I2C)的地址0x3f被识别出来了。
不同厂家的LCD1602(I2C),设备地址可能不同,请仔细查阅所用设备的说明。
后续代码中,也要做对应的处理。

如果在列表中,没有看到传感器的地址,请仔细检查传感器的I2C的接线是否正常。
如果因为程序错误,导致I2C设备打开后,进入busy状态,那就把开发板断电,然后重新上电启动,再次进行检查。
六、编写代码
原始代码,来自于: bitbank2/LCD1602: A C library (Linux + Arduino) to control 2 line x 16 character I2C LCD displays
但是改代码,不能直接使用,需要做一些修改处理,才能够正常运行
最终,使用的实际代码如下:
文件:lcd1602.h
//
// LCD1602 2 line by 16 character LCD library
//

#ifndef LCD1602_H
#define LCD1602_H

//
// Opens a file system handle to the I2C device
// Turns on the LCD, sets the 4-bit mode and clears the memory
// Returns 0 for success, 1 for failure
//
int lcd1602Init(int iChannel, int iAddr);

//
// Set the LCD Pulse Period
//
void lcd1602SetPulsePeriod(int val);

//
// Set the cursor position on the LCD
//
int lcd1602SetCursor(int x, int y);

//
// Control the backlight, cursor, and blink
//
int lcd1602Control(int bBacklight, int bCursor, int bBlink);

//
// Print a zero-terminated character string
// Only 1 line at a time can be accessed
//
int lcd1602WriteString(char *szText);

//
// Clear the characters from the LCD
//
int lcd1602Clear(void);

//
// Turn off the LCD and backlight
// close the I2C file handle
//
void lcd1602Shutdown(void);

#endif // LCD1602_H
文件:lcd1602.c
//
// 2x16 LCD display (HD44780 controller + I2C chip)
//

#include <unistd.h>
#include <stdio.h>
#include <string.h>
#include <stdint.h>
#include <fcntl.h>
#include <sys/ioctl.h>
#include <linux/types.h>
#include <linux/i2c-dev.h>

#define PULSE_PERIOD 500
#define CMD_PERIOD 4100

#define BACKLIGHT 8
#define DATA 1
static int iBackLight = BACKLIGHT;
static int file_i2c = -1;
static int iPulsePeriod = PULSE_PERIOD;

static int lcd1602_write(int file_i2c_hd, const void *buf, size_t len)
{
	// int j;
	// for(j = 0; j < len; ++j)
	// 	printf("HEX: %02x\n", ((uint8_t*) buf)[j]);
	int ret = write(file_i2c_hd, buf, len);
	return ret;
}

static void lcd1602_writeCommand(unsigned char ucCMD)
{
	unsigned char uc;

	uc = (ucCMD & 0xf0) | iBackLight; // most significant nibble sent first
	lcd1602_write(file_i2c, &uc, 1);
	usleep(iPulsePeriod); // manually pulse the clock line
	uc |= 4;			  // enable pulse
	lcd1602_write(file_i2c, &uc, 1);
	usleep(iPulsePeriod);
	uc &= ~4; // toggle pulse
	lcd1602_write(file_i2c, &uc, 1);
	usleep(CMD_PERIOD);
	uc = iBackLight | (ucCMD << 4); // least significant nibble
	lcd1602_write(file_i2c, &uc, 1);
	usleep(iPulsePeriod);
	uc |= 4; // enable pulse
	lcd1602_write(file_i2c, &uc, 1);
	usleep(iPulsePeriod);
	uc &= ~4; // toggle pulse
	lcd1602_write(file_i2c, &uc, 1);
	usleep(CMD_PERIOD);

} /* lcd1602_writeCommand() */

//
// Control the backlight, cursor, and blink
// The cursor is an underline and is separate and distinct
// from the blinking block option
//
int lcd1602Control(int bBacklight, int bCursor, int bBlink)
{
	unsigned char ucCMD = 0xc; // display control

	if (file_i2c < 0)
		return 1;
	iBackLight = (bBacklight) ? BACKLIGHT : 0;
	if (bCursor)
		ucCMD |= 2;
	if (bBlink)
		ucCMD |= 1;
	lcd1602_writeCommand(ucCMD);

	return 0;
} /* lcd1602Control() */

//
// lcd1602_write an ASCII string (up to 16 characters at a time)
//
int lcd1602WriteString(char *text)
{
	unsigned char ucTemp[2];
	int i = 0;

	if (file_i2c < 0 || text == NULL)
		return 1;

	while (i < 16 && *text)
	{
		ucTemp[0] = iBackLight | DATA | (*text & 0xf0);
		lcd1602_write(file_i2c, ucTemp, 1);
		usleep(iPulsePeriod);
		ucTemp[0] |= 4; // pulse E
		lcd1602_write(file_i2c, ucTemp, 1);
		usleep(iPulsePeriod);
		ucTemp[0] &= ~4;
		lcd1602_write(file_i2c, ucTemp, 1);
		usleep(iPulsePeriod);
		ucTemp[0] = iBackLight | DATA | (*text << 4);
		lcd1602_write(file_i2c, ucTemp, 1);
		ucTemp[0] |= 4; // pulse E
		lcd1602_write(file_i2c, ucTemp, 1);
		usleep(iPulsePeriod);
		ucTemp[0] &= ~4;
		lcd1602_write(file_i2c, ucTemp, 1);
		usleep(CMD_PERIOD);
		text++;
		i++;
	}
	return 0;
} /* lcd1602_writeString() */

//
// Erase the display memory and reset the cursor to 0,0
//
int lcd1602Clear(void)
{
	if (file_i2c < 0)
		return 1;
	lcd1602_writeCommand(0x0E); // clear the screen
	return 0;

} /* lcd1602Clear() */

//
// Open a file handle to the I2C device
// Set the controller into 4-bit mode and clear the display
// returns 0 for success, 1 for failure
//
int lcd1602Init(int iChannel, int iAddr)
{
	char szFile[32];
	int rc;

	sprintf(szFile, "/dev/i2c-%d", iChannel);
	file_i2c = open(szFile, O_RDWR);
	if (file_i2c < 0)
	{
		fprintf(stderr, "Error opening i2c device; not running as sudo?\n");
		return 1;
	}
	rc = ioctl(file_i2c, I2C_SLAVE, iAddr);
	if (rc < 0)
	{
		close(file_i2c);
		fprintf(stderr, "Error setting I2C device address\n");
		return 1;
	}
	iBackLight = BACKLIGHT;		// turn on backlight
	lcd1602_writeCommand(0x02); // Set 4-bit mode of the LCD controller
	lcd1602_writeCommand(0x28); // 2 lines, 5x8 dot matrix
	lcd1602_writeCommand(0x0c); // display on, cursor off
	lcd1602_writeCommand(0x06); // inc cursor to right when writing and don't scroll
	lcd1602_writeCommand(0x80); // set cursor to row 1, column 1
	lcd1602Clear();				// clear the memory

	return 0;
} /* lcd1602Init() */

//
// Set the LCD cursor position
//
int lcd1602SetCursor(int x, int y)
{
	unsigned char cCmd;

	if (file_i2c < 0 || x < 0 || x > 15 || y < 0 || y > 1)
		return 1;

	cCmd = (y == 0) ? 0x80 : 0xc0;
	cCmd |= x;
	lcd1602_writeCommand(cCmd);
	return 0;

} /* lcd1602SetCursor() */

//
// Set the LCD Pulse Period
//
void lcd1602SetPulsePeriod(int val)
{
	iPulsePeriod = val;
} /* lcd1602SetPulsePeriod() */

void lcd1602Shutdown(void)
{
	iBackLight = 0;				// turn off backlight
	lcd1602_writeCommand(0x08); // turn off display, cursor and blink
	close(file_i2c);
	file_i2c = -1;
} /* lcd1602Shutdown() */
文件:lcd1602_demo.c
#include <unistd.h>
#include <stdio.h>
#include <string.h>
#include <stdint.h>

#include "lcd1602.h"

int main(int argc, char *argv[])
{
	int rc;
	char str[17] = {0};
	char ip[16] = {0};

	sprintf(ip, "%s", "192.168.0.3");

	rc = lcd1602Init(2, 0x3f);
	if (rc)
	{
		printf("Initialization LCD1602 failed; aborting...\n");
		return 0;
	} else {
		printf("Initialization LCD1602 ok!\n");
	}

	// welcome
	lcd1602SetCursor(0, 0);
	sprintf(str, "%-16s", "Hello World!");
	lcd1602WriteString(str);
	lcd1602SetCursor(0, 1);
	sprintf(str, "%-16s", "I'm DongShan Pi!");
	lcd1602WriteString(str);

	sleep(3);

	// ip
	lcd1602SetCursor(0, 0);
	sprintf(str, "%-16s", "My IP addr is:");
	lcd1602WriteString(str);
	lcd1602SetCursor(0, 1);
	sprintf(str, "%-16s", ip);
	lcd1602WriteString(str);

	sleep(5);

	// quit
	lcd1602SetCursor(0, 0);
	lcd1602WriteString(str);
	lcd1602SetCursor(0, 1);
	sprintf(str, "%-16s", "ENTER to quit");
	lcd1602WriteString("ENTER to quit");

	// blonk
	lcd1602Control(1, 0, 1); // backlight on, underline off, blink block on

	printf("ENTER to quit...\n");
	getchar();

	// shutdown
	lcd1602Shutdown();
	return 0;
} /* main() */
在上述代码中:
- lcd1602.h:LCD1602控制调用头文件
- lcd1602.c:LCD1602控制调用具体实现
- lcd1602_demo.c:测试程序
程序的基本逻辑如下:
- 初始化LCD1602
- 输出欢迎信息"Hello World!" 和 “I’m DongShan Pi!”
- 延迟3秒
- 输出"My IP addr is:“和"192.168.0.3”
- 延迟3秒
- 输出IP信息,及"ENTER to quit"
- 如果在命令行回车,就退出
七、编译代码并执行
这里需要注意的是,编写、编译、上传、执行,是在不同的环境:
- 编写:可以在编译固件的环境,也可以在主机环境编写好以后在编译环境编译
- 编译:在编译固件的环境中编译
- 上传:在主机环境,通过adb上传到开发板
- 执行:在开发板上执行
那就先编译代码:
# 设置编译工具路径
export PATH=/sdk/tina-d1-h/prebuilt/gcc/linux-x86/riscv/toolchain-thead-glibc/riscv64-glibc-gcc-thead_20200702/bin/:$PATH

# 编译
riscv64-unknown-linux-gnu-gcc -o lcd1602_demo lcd1602_demo.c lcd1602.c

# 查看结果
ls -lh lcd1602_demo
    -rwxr-xr-x 1 root 17K Nov  6 10:02 lcd1602_demo
编译完成后,在主机上,使用adb上传:
adb push lcd1602_demo /root/
最后,在开发板上执行:
/root/lcd_demo
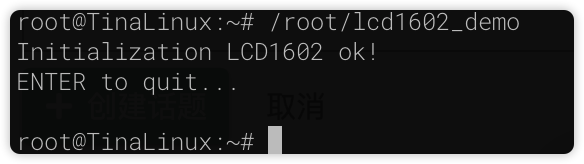
LCD液晶屏上实际输出如下:
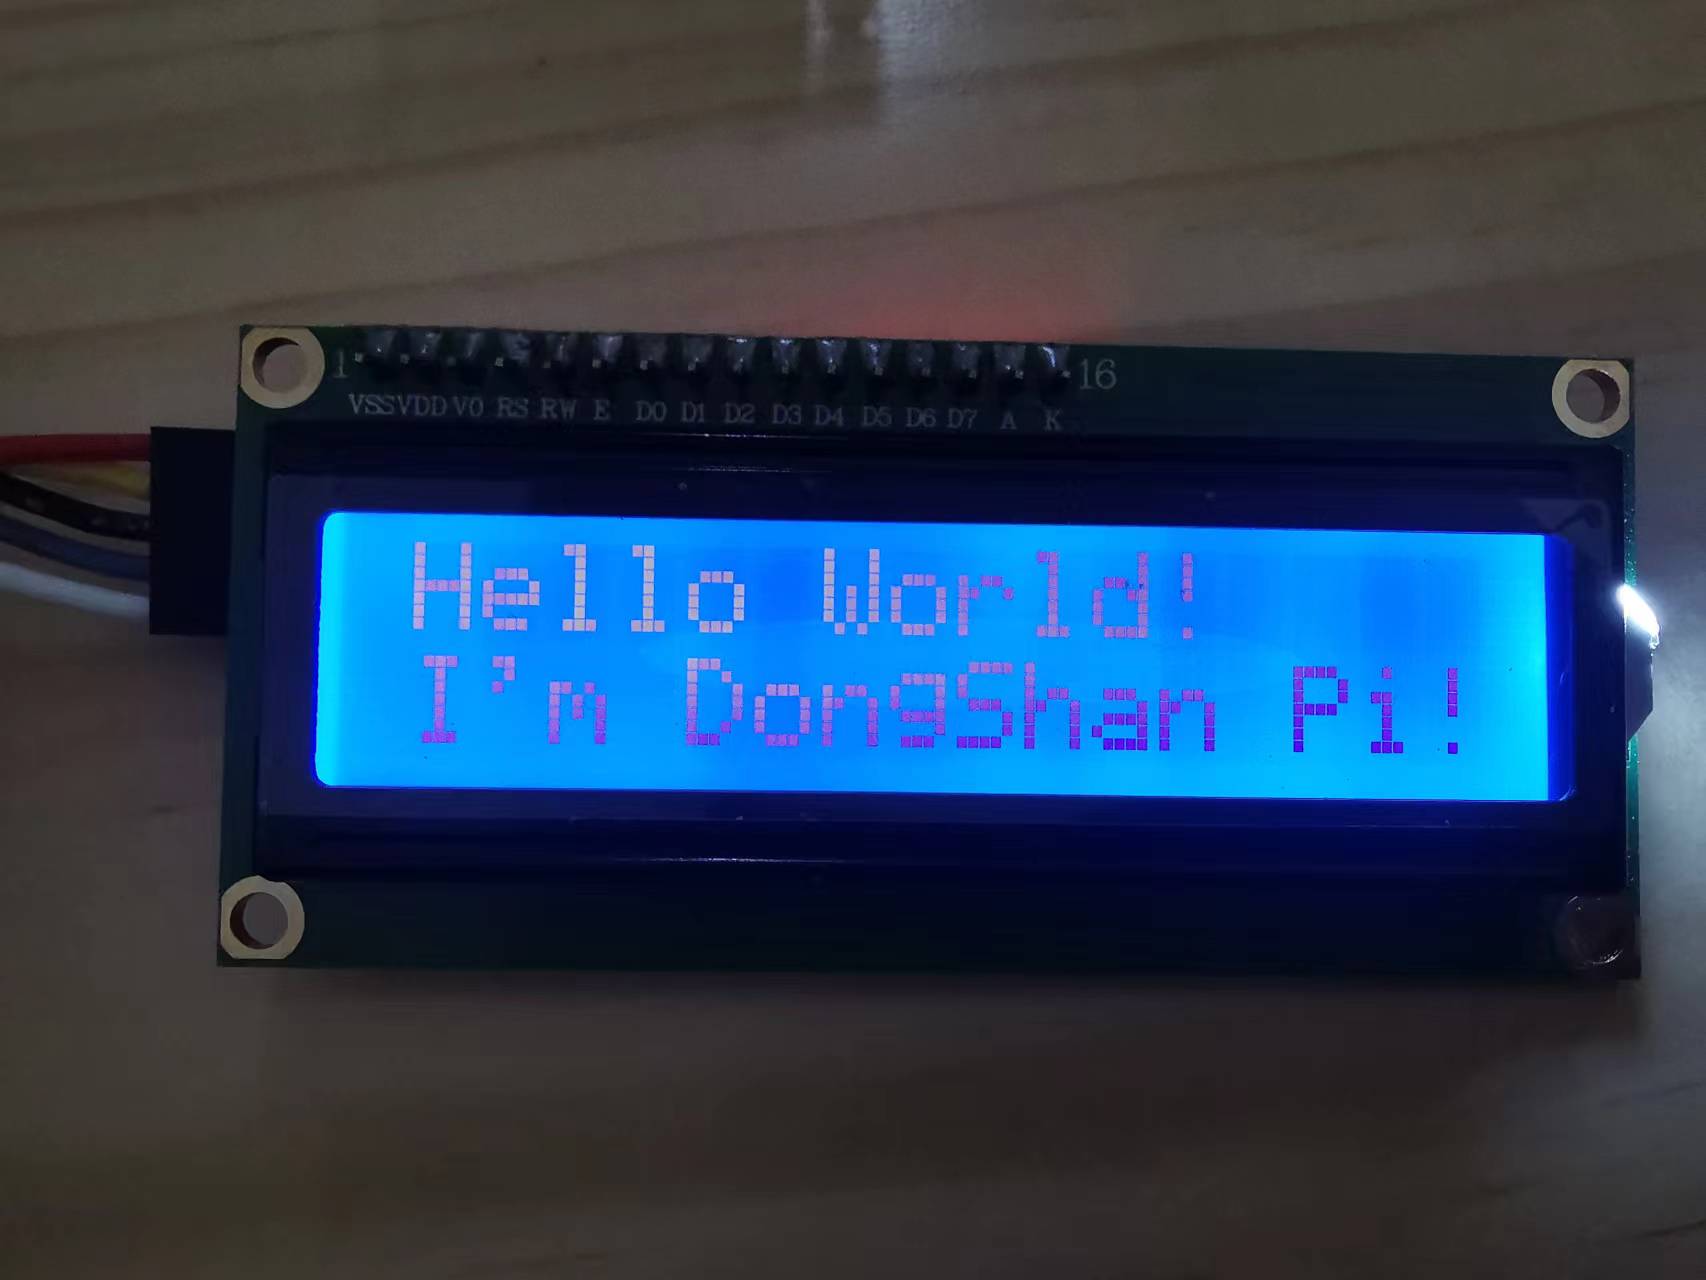
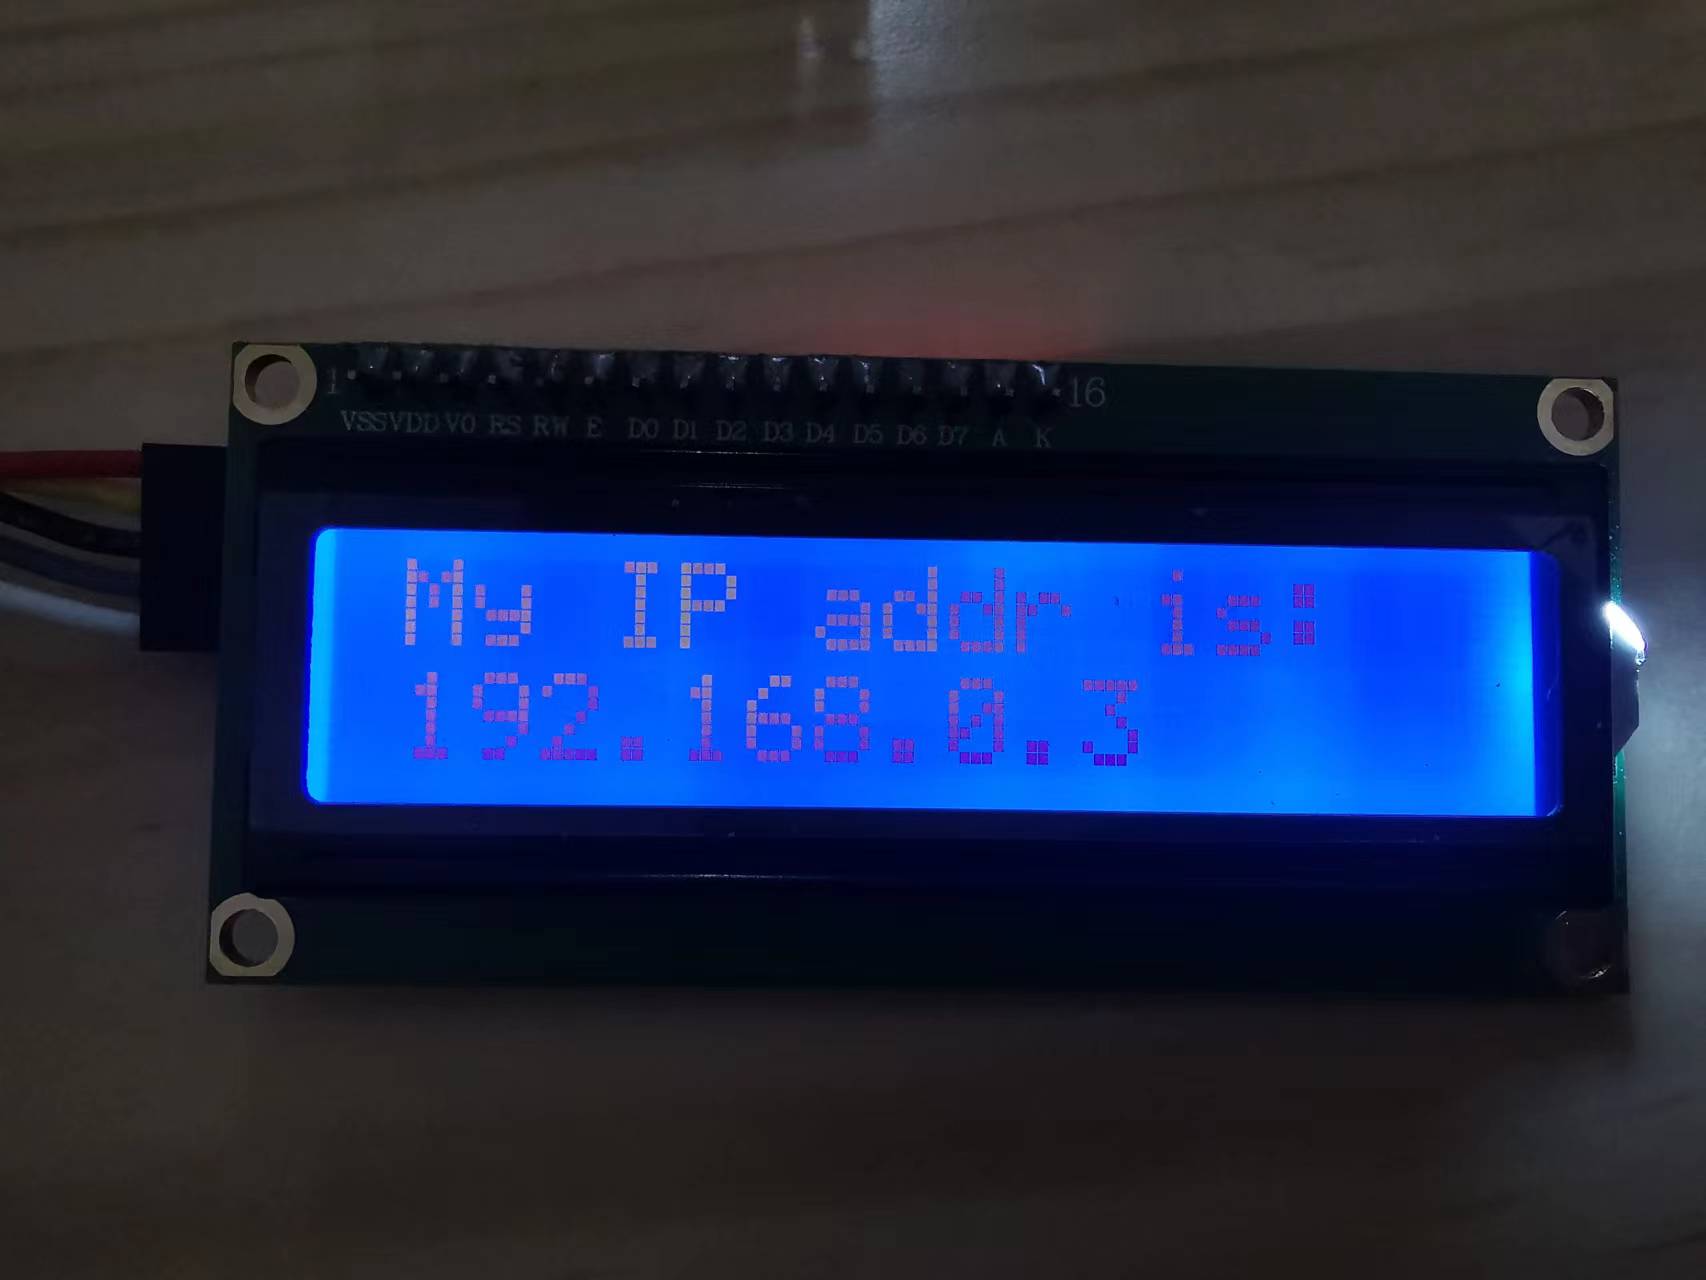
虽然这个LCD1602的液晶屏上,只能显示16*2的字符,但是用于输出一点IP地址,或者提示信息,还是挺方便的。